[ad_1]
The world of art encompasses various techniques, styles, and mediums. Learning different techniques is key to expanding your artistic horizons for any art student or aspiring artist. This comprehensive guide covers a diverse range of fundamental art techniques worth knowing.
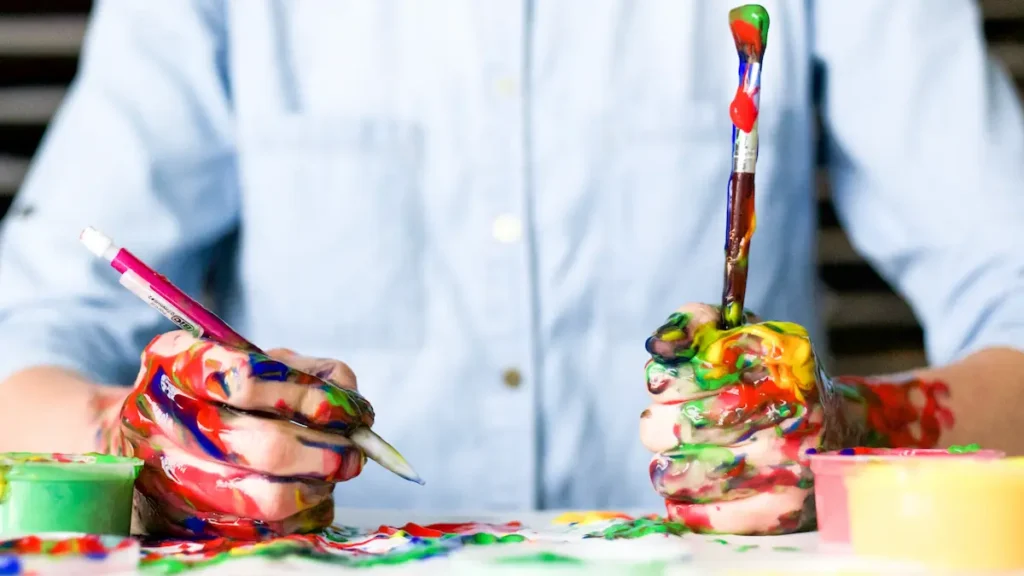
Understanding these techniques will give you a toolkit to bring your creative visions to life. Whether you’re just starting or looking to add more techniques to your artistic repertoire, exploring these methods can enrich your artwork and take your skills to the next level.
Overview of art techniques
Art techniques refer to the different methods and processes used to create art. They involve applying artistic skills and tools to achieve certain visual effects.
Mastering various techniques allows artists to choose the right approach for what they wish to communicate visually. For example, an artist may utilize watercolor washes for a soft, blended look or impasto brush strokes to add texture.
Some techniques are associated with specific mediums like oils, acrylics, or pastels. Others can be applied across different mediums. An artist can employ many techniques in a single artwork to attain their desired creative vision.
Understanding the spectrum of techniques is invaluable for budding artists. It enables artistic growth, fuels creativity, and opens new avenues for self-expression.
Core art techniques to know
Here are some of the fundamental art techniques that every artist should be familiar with:
1. Sketching
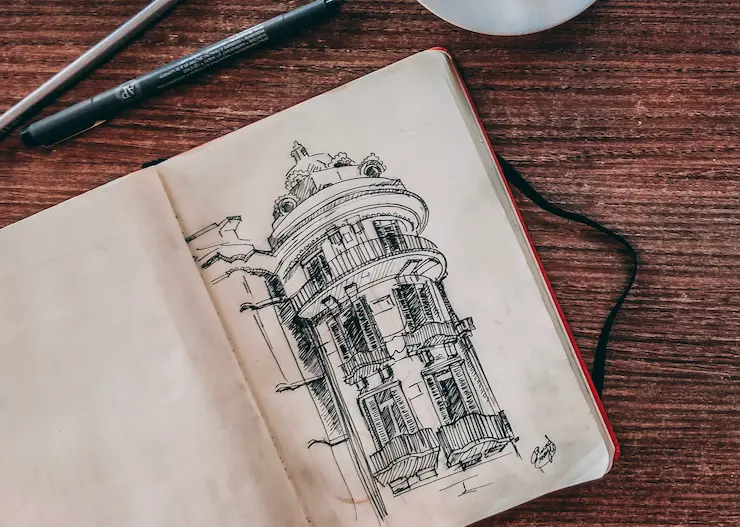
Description: Sketching involves creating rough, loose drawings that capture the essence of an idea. It allows an artist to plan compositions and work out details without the constraints of a formal finished piece.
Applications: Planning paintings or sculptures, developing concepts, quick figure drawing, prototyping designs, and more.
Materials: Pencils, charcoal, pens, markers, sketchpads or canvas.
Tips: Focus on overall shapes rather than details, use quick gestural lines, vary line weight, and keep it loose.
2. Impasto
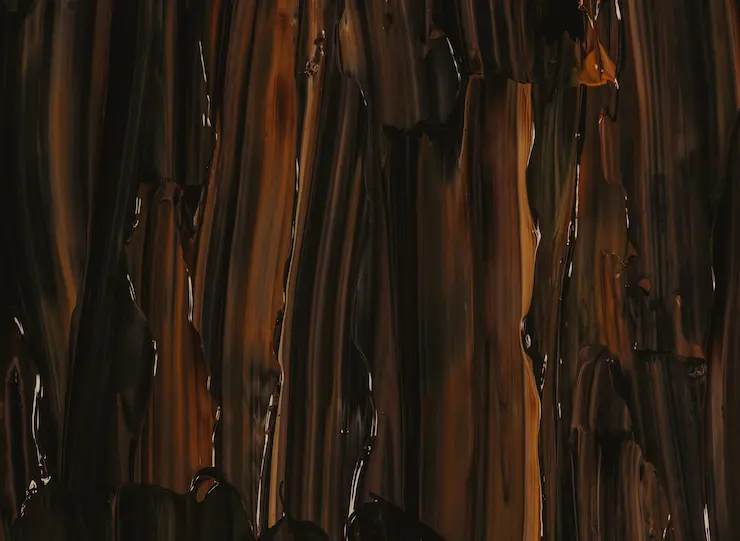
Description: Impasto is a thickly applied paint that retains visible brushstrokes or texture. The paint stands out from the surface, creating an almost 3D effect.
Applications: Adding texture, emphasizing focal points, creating energy, and adding interest.
Materials: Acrylic or oil paints, painting knives, or stiff bristle brushes.
Tips: Use thick paints, apply in short controlled strokes, blend colors, and clean brushes well.
3. Watercolor washes
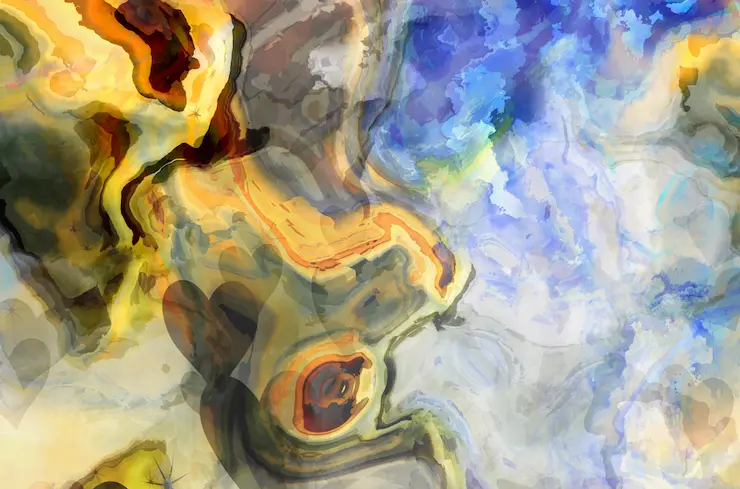
Description: Watercolor washes involve diluting paint to transparent, semi-transparent, or semi-opaque layers. The wet paint bleeds softly into the paper.
Applications: Gradual gradients, smooth blending, natural backgrounds, light shading.
Materials: Watercolor paints, wet brush, watercolor paper.
Tips: Apply thin coats, work from light to dark, and allow drying in between.
4. Stippling
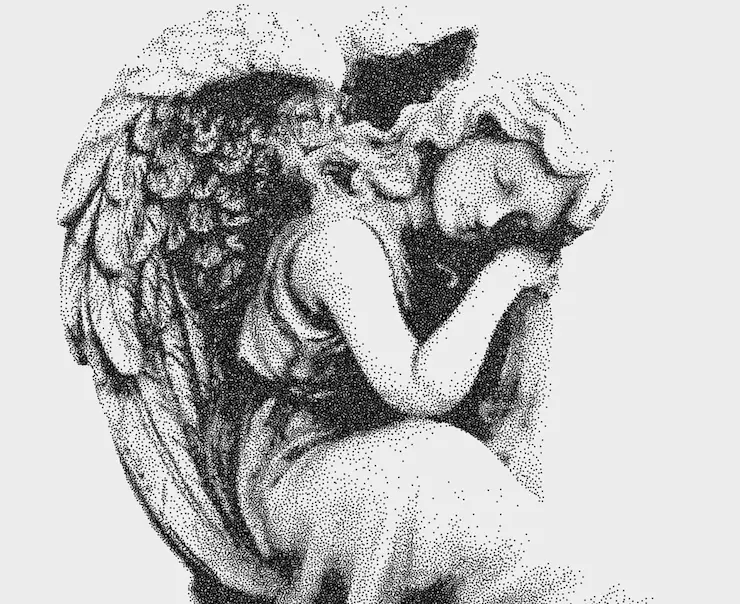
Description: Stippling uses small dots rather than solid lines to create gradients, patterns, and textures. The closer the dots, the darker an area appears.
Applications: Refine edges, intricate shading, detailed pencil drawings.
Materials: Pens, pencils, markers, brushes, stipple tools.
Tips: Vary dot size and spacing. Use curved motion layer dots for depth.
5. Sgraffito
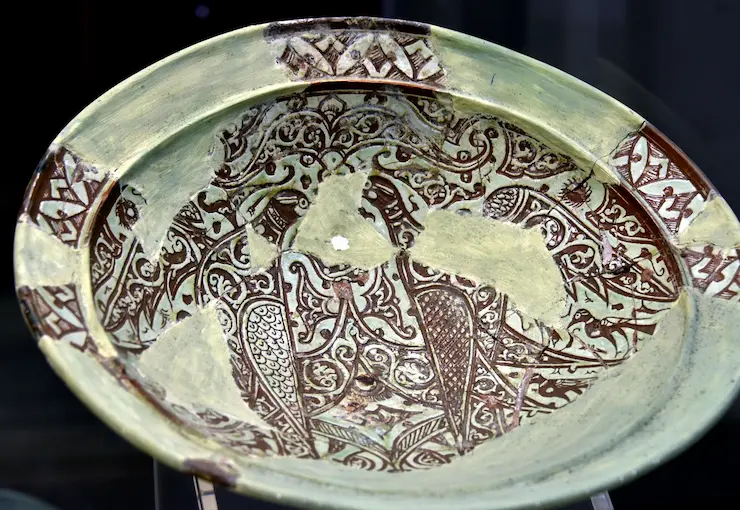
Description: Sgraffito involves scratching or etching into a surface to reveal underlying layers of color. It comes from the Italian word “sgraffiare,” meaning “to scrape”.
Applications: Ceramics, paintings, illustrations, mixed media.
Materials: Tool for scratching (stylus, knife, skewer), painted/polished surface.
Tips: Apply dark over light, scratch smoothly, and keep layers thin.
6. Dry brushing
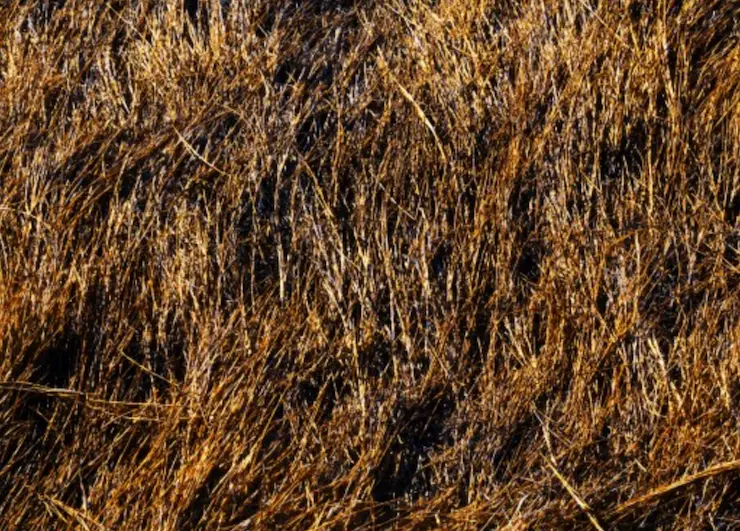
Description: Dry brushing uses a paint-loaded brush over the dry substrate, catching ridges and leaving no visible brushstrokes. It adds texture and emphasizes forms.
Applications: Highlighting, weathered looks, grainy textures, rustic styles.
Materials: Stiff bristle brush, thick paint (usually oil or acrylic).
Tips: Wipe the brush on a rag, sweep lightly over the surface, and apply pressure to catch texture.
7. Wet-on-wet
Description: Wet-on-wet involves painting wet paint over an already wet painted surface so the colors visually blend and bleed into each other.
Applications: Soft floral backgrounds, hazy landscapes, water scenes.
Materials: Fluid paints like watercolor or thinned acrylics, wet paper, or canvas.
Tips: Work quickly, use big brushes, and allow colors to mingle naturally.
8. Pointillism
Description: Pointillism uses small, distinct dots of pure color that blend optically to create shading, depth, and form. It falls under the Neo-Impressionist movement.
Applications: Vibrant, detailed paintings reminiscent of pixilation.
Materials: Paints, dotting tools, or short, stiff, bristled brushes.
Tips: Overlap colors, vary dot size and density, and step back occasionally.
9. Chiaroscuro
Description: Chiaroscuro strongly contrasts light and dark, usually bold shadows against highlighted sections to create dramatic effects.
Applications: Highlights focus, injects drama, sets mood, spotlighting.
Materials: Drawing materials like charcoal or paint.
Tips: Establish a light source, start dark, then add highlights.
10. Scumbling
Description: Scumbling is lightly brushing thin, semi-opaque layers of paint over another layer to give a softened, cloudy effect.
Applications: Antique, weathered finishes, muted, cloudy backgrounds.
Materials: Dry brush, oil paints thinned with linseed oil.
Tips: Use a light touch, work in sections, and wipe brush between colors.
11. Frottage
Description: Frottage involves creating rubbings by laying paper over different textures and rubbing with pencil or pastels to capture the surface design.
Applications: Texture studies, impressions of nature, abstract designs.
Materials: Paper, graphite, crayons, leaves, coins, etc.
Tips: Use the side of the medium, try different angles of rubbing, and layer colors.
12. Wash
Description: A wash is a thin, transparent layer of watercolor or ink. It flows smoothly and dries fast.
Applications: Flat, even color, clean blends, light tones, ink drawing.
Materials: Ink, watercolors, wet brush, paper.
Tips: Keep paper moist, work quickly, and avoid overbrushing.
13. Glazing
Description: Glazing involves applying a thin, transparent layer of paint over another layer to deepen color intensity and add subtle variations.
Applications: Intensifying colors, smoothing transitions between hues, adding depth.
Materials: Thinned acrylic, oil paint or watercolor, paintbrush.
Tips: Allow underlayers to dry first; use gloss mediums to wipe excess glaze.
14. Gouache
Description: Gouache is an opaque water-based paint. It can create flat graphic looks or be thinned for watercolor-like transparency.
Applications: Illustrations, concept art, painting, mixed media.
Materials: Gouache paints, water, brushes, paper or canvas.
Tips: Shake paints before use, thin sparingly, and use a palette knife for flat color.
15. Salt textures
Description: Salt is sprinkled or dashed onto the surface while the paint is wet. As paint dries, salt absorbs pigment, creating a textured effect.
Applications: Organic textures, starry skies, ocean spray effects.
Materials: Salt, wet paint (usually watercolors or thinned acrylics).
Tips: Apply paint first, quickly sprinkle salt randomly, and allow to dry fully before brushing off excess salt.
16. Underpainting
Description: An initial layer of paint complementary to the final color, allowing undertones to show through transparent layers.
Applications: Boost the intensity of colors, add visual interest, and increase depth.
Materials: Paintbrush, thin paint.
Tips: Use burnt umber for skin tones, purple under yellows, and opt for thinner consistency paints.
17. Surrealism
Description: Surrealism aims to capture the subconscious, dreams, and imaginations through unexpected juxtapositions of images, abstraction, and altered realities.
Applications: Fantastical, conceptual art that defies logic.
Materials: Any mediums, usually painting or digital.
Tips: Use a stream of consciousness, employ symbolism, and embrace the irrational.
18. Palette knife painting
Description: A painting technique where a palette knife is used instead of a brush to apply paint in textured, visible strokes.
Applications: Impasto textures, bold color blocking, thick paint looks.
Materials: Acrylics, oils, palette knife.
Tips: Hold the knife perpendicular to the surface, use flexible blades and layer colors.
19. Cross hatching
Description: Cross-hatching layers intersecting sets of parallel lines to shade or contour forms. Line density determines shading.
Applications: Detailed pencil shading, tonal variation, stylized illustrations.
Materials: Drawing implements like graphite pencils.
Tips: Keep lines consistent, change pressure rather than stroke, and build up gradually.
20. Oil pastels
Description: Oil pastels consist of pigments blended with non-drying oils and wax. Colors are brilliant and can be layered and blended.
Applications: Colorful drawings, vibrant strokes, mixed media.
Materials: Oil pastels, surfaces like paper, canvas, or wood.
Tips: Experiment with mark making, overlap bold colors, scrape, and blend with tools.
21. Charcoal
Description: Charcoal is a drawing medium created by charring organic materials. Vine and compressed charcoal offer varying effects.
Applications: Figure drawing, dramatic sketches, high contrast studies.
Materials: Charcoal sticks, pencil, eraser, textured paper.
Tips: Control shading with pressure, use minimal erasing and fix with spray if needed.
22. Ink Wash
Description: Ink washes feature dynamic blacks in gradients ranging from solid blacks to delicate greys. Water is used to dilute density.
Applications: Atmospheric scenes, emotional pieces, loose styles.
Materials: India or Sumi ink, watercolor brush, water, paper.
Tips: Work quickly, let the ink flow naturally, and vary brush strokes.
23. Marbling
Description: Marbling involves floating paints on thick liquid and then imprinting patterns by dipping paper or fabric into the paint.
Applications: Decorative paper, bookbinding, textile design.
Materials: Thick liquid (like carrageenan), acrylics, tray, paper or fabric.
Tips: Work fast before the paint disperses, clean the surface between prints, and hang the work to dry.
24. Collagraph printing
Description: Collage materials and textures are adhered to a plate and inked to create varying print effects.
Applications: Abstract prints, experimental art, mixed media prints.
Materials: Collage elements, printmaking ink, plate (cardboard or plexiglass).
Tips: Use tacky glue for collage elements, apply ink with a roller, and clean the plate between prints.
25. Monotype
Description: In this printmaking technique, ink is applied to a plate and then partially wiped away to form an image before printing. Each print is unique.
Applications: Painterly effects in printmaking, impressionistic styles.
Materials: Printmaking paper, etching ink, acrylic paint, plate (glass, metal).
Tips: Keep the image simple, and clean the plate thoroughly after each print.
Additional techniques to explore
Beyond the core essential techniques, there are tons more artistic methods for creatives to try. Expanding your skills into diverse techniques will add new dimensions to your artistic practice.
Here are some additional techniques worth exploring as an artist:
Acrylic pouring: Fluid acrylics are poured onto a surface and tilted to manipulate streams and cells.
Airbrushing: Pigments are sprayed onto a surface using an air compressor and specialized airbrushing guns.
Decoupage: Cut paper designs are collaged onto objects and sealed with varnish or glue.
Drip painting: Paint is dripped and splattered onto a canvas to form abstract compositions.
Ebru: In this printmaking technique, paint is swirled onto the water and then transferred to paper by laying it on its surface.
Encaustic: Pigments are mixed with hot beeswax and resin and applied while molten to create rich textures and translucent color.
Flocking: An adhesive is applied to a surface and then coated with fibers or powdered materials to create a textured, velvet-like finish.
Frottage: Rubbings are taken from a textured surface by laying paper on top and rubbing with pastels, graphite, or charcoal.
Graffiti: Aerosol paints are sprayed onto surfaces through stencils or freehand to create stylized typography and imagery.
Linocut: A design is carved out of linoleum, then inked and transferred to paper through pressure to achieve relief prints.
Mosaic: Small pieces of glass, tile, or other materials are arranged and set in place to form images or patterns.
Punch needle: Embroidery yarn is looped through a stiff perforated fabric using a punch needle tool to create fiber art.
Scumbling: Using a dry brush, thin opaque layers are brushed over another layer to create softened edges and textures.
Sgraffito: A top layer of paint is scratched away to reveal the color underneath, often creating white outlines.
Wood burning: Pyrography tools transfer heat to wood surfaces to burn intricate designs.
The possibilities are truly endless when it comes to art techniques. Don’t be afraid to think outside the box and experiment. You never know what new favorite techniques you may discover!
Combining techniques in mixed media
While individual techniques have unique applications, combining multiple techniques in mixed media art can lead to fresh modes of expression.
Mixed media enables artists to produce multidimensional work unconstrained by the limitations of any single medium. It opens up room for boundless creativity.
Some examples of mixed media techniques include:
Build up layers of watercolor washes, then use ink outlines to add definitions.
Apply thick acrylic paint with a palette knife, then scratch it with a wood carving tool to reveal colors underneath.
Create an abstract collage, then enhance it with paint details using blending techniques like scumbling or glazing.
Use stencils and spray paints to form a graffiti-style background, then add pen stippling for shading.
Print a nature-inspired texture using linocut techniques, then draw whimsical ink illustrations overtop.
Combine magazine clippings, fabric scraps, and found objects on a canvas building intriguing textures, then mount it in a shadow box.
Fusing different techniques opens up new creative possibilities exponentially greater than any single technique. Don’t be afraid to think outside the box; let your creativity guide you organically when combining techniques in mixed media art.
Choosing techniques based on the medium
The medium you work with will influence suitable options when deciding which techniques to utilize.
Different qualities of the medium lend themselves better to certain techniques. Here are some examples:
Oil paints – Layering, impasto, glazing, scumbling, wet-on-wet, palette knife painting
Watercolors – Washes, wet-on-wet, ink and wash, salt textures, lifting, splattering
Acrylics – Glazing, transfers, stippling, impasto, mixed media, pouring
Pastels – Blending, overlaying, scraffito, finger painting, pointillism
Charcoal – Smudging, lifting, erasing, crosshatching, contour line
Pencils – Stippling, hatching, rendering, pointillism, proportional methods
Inks – Wash techniques, dotwork, calligraphy, splattering, pens
Graphite – Blending, crosshatching, scribbling, sketching
Conté crayons – Bold line work, broad shading, rapid sketching
Printmaking – Woodblock, linocut, collagraph, etching, monoprint
This list scratches the surface, but as you can see, the medium informs suitable techniques. Study the properties of your materials, then brainstorm techniques that utilize their unique advantages.
Art techniques using digital media
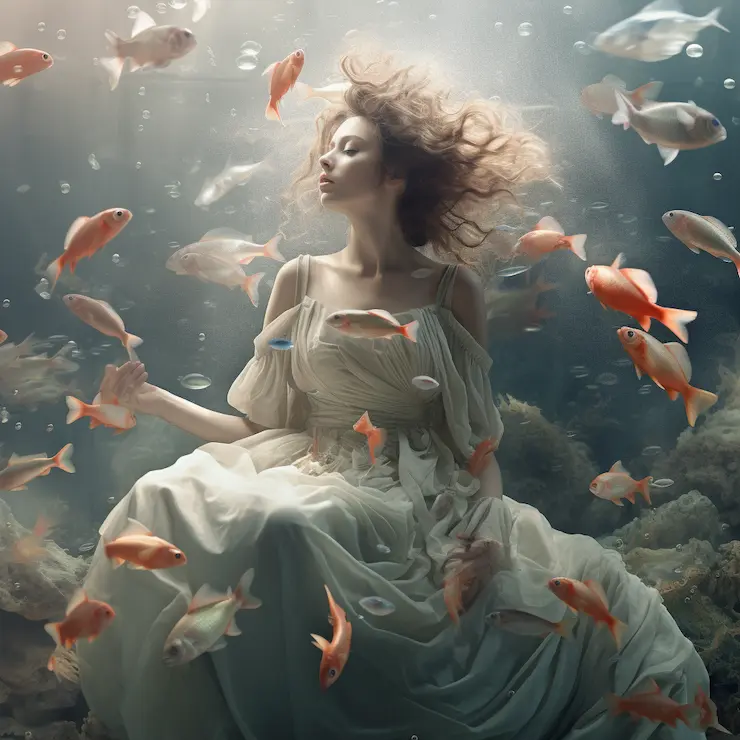
Digital art has unlocked radical new painting techniques that traditional mediums cannot achieve. With digital tools, artists can work with unlimited flexibility and enhanced creative control.
Here are some examples of unique techniques made possible with digital art mediums:
Photo bashing: Blending multiple photographic elements to create fantastical composite images.
Matte painting: Digitally painting extensions or alterations to photographed environments.
Pixel art: Creating art in a low-resolution raster style that emulates retro video games.
Digital sculpting: Using 3D software to sculpt and render detailed models.
Vector art: Creating illustrations with scalable, mathematical lines and curves rather than pixels.
Isometric art: 3D-looking environments drawn in sharp parallel angles using graphic style shapes.
Parallax scrolling: Adding depth and motion to scenes through layered backgrounds and perspectives that shift as you scroll.
Cinemagraphs: Photos featuring isolated motion usually repeated in seamless loops.
Glitch art: Manipulating digital code or files to produce colorful, distorted visuals.
Plotter art: Computer-controlled pens draw abstract geometric patterns across large formats.
Generative art: Coded algorithms generate endless unique iterations of audiovisual pieces in real time.
Projection mapping: Spectacular animation and video effects mapped onto physical objects and environments.
As digital art evolves, the possibilities for inventing new creative techniques are limitless. Digital artists should constantly study emerging styles and tools to expand their technical skills.
Incorporating unconventional materials
Beyond standard art materials like paint, paper, and clay, many artists turn to unorthodox everyday materials to produce original works of art. Incorporating unexpected materials can add new dimensions, literally and figuratively, to your artistic practice.
Some examples include:
- String, yarn, twigs, pine needles, leaves, flowers, eggshells, pebbles, sand, seashells, feathers, fabric scraps, wood pieces, glass shards, beads, seeds, bottle caps, wires, found objects, photographs, etc.
Natural and recycled materials provide excellent textures. The irregular forms compel artists to think differently compared to uniform conventional materials. Abstract compositions come about more organically when you allow the materials to guide your process.
Repurposed everyday items also contain symbolic significance as artifacts of modern life. A crumpled food wrapper could represent disposable consumer culture, while bottle caps may indicate pollution. Found items with political, social, or personal resonance add conceptual depth.
Unconventional materials force you to problem solve as you experiment with joining methods, structural stability, prevent deterioration, and consider weight, shape, and installation challenges. Technical learning expands your skill set.
Next time you’re starting a new artwork, look at common objects around you. With creative vision, any material can become a compelling artistic medium.
Key takeaways
Mastering different art techniques expands an artist’s creative capabilities and visual effects they can achieve. A strong foundation helps unlock greater versatility.
Certain techniques naturally lend themselves to specific applications or media based on their visual qualities. Analyze your goals to determine suitable techniques.
Core essential techniques like sketching, shading, composition, and color theory form the building blocks for any medium. Learn these before specializing.
Mixed media combining multiple techniques opens up new possibilities that constrained artists would not imagine sticking to one medium alone. Don’t be afraid to blend techniques in innovative ways.
Digital art has introduced new techniques like photo manipulation, graphic design, and generative art, bringing new dimensions to modern art.
Look beyond conventional art materials to everyday objects, which can add interesting textures, conceptual depth, and technical challenges.
An artist’s style emerges organically over time as you discover which techniques best fit your vision. Continuous experimentation leads to both refinement and daring new frontiers.
Art techniques are vast, but with an eager student mindset and playful creativity, any artist can continually expand their technical skills. Be bold in exploring unfamiliar terrain – you never know what wondrous art you may create!
Frequently Asked Questions
What are some easy art techniques for beginners to try?
Some easy techniques for beginners include sketching with pencil, using watercolor washes, ink and wash drawing, mono-printing, salt texturing, stippling, alcohol ink effects, and basic collage. Focus on materials, allowing trial and error as you build skills.
How do I choose which art techniques to learn?
Consider your medium, personal style, and subject matter. For example, painters should learn blending techniques like glazing. Abstract artists can experiment more with texture methods or unconventional materials. Research techniques used by artists who inspire you. Building versatility takes time – be patient in expanding your repertoire.
What basic supplies do I need to practice art techniques?
Start with versatile basics like pencils, erasers, graphite sticks, sketchpads, paint brushes, acrylic or watercolor paints, canvas/paper, easels, rags, water jars, palettes, utility knives, and rulers. Supplement with other tools as you explore specific techniques further. Focus the budget on a quality sketchpad, paints, and brushes first.
How can I learn art techniques outside of art classes?
Excellent resources exist beyond formal courses. Check out library books, read blogs, and watch free YouTube tutorials to learn techniques step-by-step. Visit art museums to analyze how historical artists used techniques. Recreate techniques seen in artwork you admire. Practice regularly and continue learning.
What is an easy printmaking technique for beginners?
Monoprinting is an excellent introductory printmaking technique requiring minimal supplies. Paint freely on an acrylic sheet or smooth surface with acrylic paint. Press the paper on top to transfer the image, then lift the printed paper. Each print will be a unique painting-like impression. Other easy methods include potato printing, collograph, foil embossing, or sun printing.
Should I master realism before exploring other art styles?
Not necessarily. Developing observational skills through some life drawing is useful, but you can explore other aesthetics from the start. Modern artists need not master realism first – art expresses diverse visions beyond realism. Focus instead on mastering the techniques needed to convey your style, whatever form that may take.
How do I transition from drawing to painting successfully?
Painting utilizes many concepts from drawing, like composition, value, and color theory, that translate well. Use underpainting techniques to start paintings with pencil outlines, ensuring proper proportions before painting. Use thin washes of paint at first for less overwhelm. Take time to understand how paints blend and the differences in brush techniques required. Draw inspiration from other paintings.
What are easy techniques to add texture to a painting?
Many options exist like impasto thick paint strokes, adding paint mediums or gels to increase texture, dry brushing, which catches surface ridges, using a painting knife instead of a brush, mixing media like sand into paint, scribbling with pencils under washes, inconsistent glazing layers, scratching or scraping paint when dry for aged looks.
What basic techniques should sculptors know?
Key sculpting skills include armatures/structures, additive vs. subtractive techniques, measurement and calipers, modeling with clay, mold making and casting, carving mediums like stone or wood, joining methods like welding or gluing, polishing, and finishing techniques. Understanding the properties of sculptural materials is crucial.
[ad_2]
